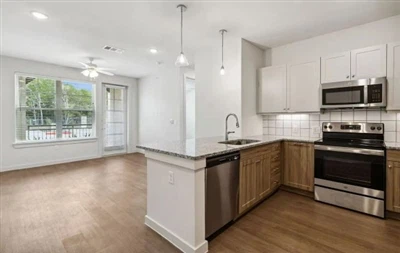
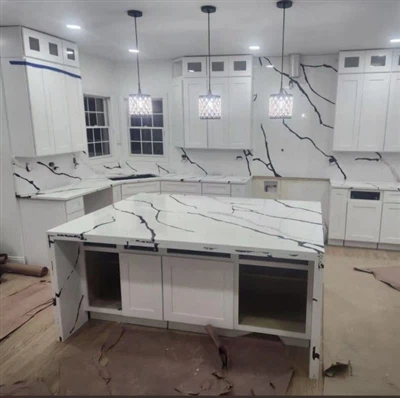
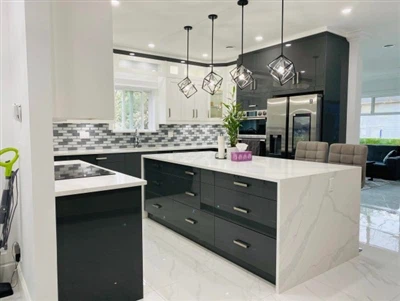
can you make a kitchen island with base cabinets
Jul 03, 2025
Leave a message
Can you make a kitchen island with base cabinets?
Yes, you can definitely build a functional and stylish kitchen island using base cabinets! This approach is popular for its cost-efficiency, customization flexibility, and DIY accessibility. Below is a comprehensive guide synthesizing key steps and considerations from expert sources:
✅ Key Advantages of Using Base Cabinets
Cost Savings:
Stock base cabinets (e.g., IKEA SEKTION, Home Depot) cost 200–800 for a full island vs. $1,500+ for custom builds .
Simplified Assembly:
Pre-built cabinets ensure standardized dimensions (e.g., 24" depth, 34.5" height) and reduce construction time to 6–10 hours.
Design Consistency:
Match existing kitchen cabinetry for a cohesive look
how much distance between kitchen island and cabinets
The ideal distance between a kitchen island and surrounding cabinets depends on kitchen size, functionality needs, and safety standards. Based on industry guidelines from the NKBA and expert designers, here's a detailed breakdown:
📏 1. Minimum vs. Ideal Distances
| Scenario | Recommended Distance | Key Considerations |
|---|---|---|
| Absolute Minimum | 36 inches (3 feet) | Allows basic movement and cabinet access in small kitchens; may feel cramped with appliances or multiple users. |
| Standard Recommendation | 42–48 inches | Optimal for comfort, workflow, and safety. Ideal for: - Single-cook kitchens (42") - Multi-user kitchens (48") - Islands with seating . |
| Wheelchair Accessibility | 48–60 inches | Ensures ADA compliance and ease of movement. |
⚙️ 2. Critical Factors Influencing Spacing
A. Appliance & Cabinet Functionality
If appliances (e.g., ovens, dishwashers) open toward the island, **≥48 inches** is necessary to avoid obstruction .
Allow extra 6–12 inches behind seating stools for chair movement and safe navigation .
B. Kitchen Layout Principles
Work Aisles: For back-to-back workspaces (e.g., island facing countertops), maintain 4–6 feet of clearance .
Kitchen Triangle: Ensure the sink, stove, and refrigerator are within an efficient triangular layout, avoiding island obstruction .
C. Island Size & Seating
Seating Overhangs: Allocate 24–30 inches per stool depth and 22–24 inches width per person .
Island Depth: Standard islands are 24–36 inches deep; deeper designs require wider clearance .
⚠️ 3. Pitfalls to Avoid
Cramped Spaces: ≤36 inches impedes movement, risks collisions with open appliances, and complicates meal prep .
Ignoring Traffic Flow: In high-traffic kitchens, <42 inches disrupts workflow, especially with multiple cooks .
Flooring Constraints: For floating floors (e.g., vinyl, laminate), install the island before flooring to avoid gaps .
💡 4. Pro Tips for Small Kitchens
If kitchen width is <13 feet, skip the island or opt for a mobile cart .
Use narrow islands (24" depth) with minimal overhangs to maximize space .
Prioritize 42-inch clearance even in tight spaces by downsizing base cabinets .
📐 5. Quick Reference Cheat Sheet
| Element | Measurement |
|---|---|
| Minimum clearance | 36 inches |
| Ideal clearance | 42–48 inches |
| Per-stool width | 22–24 inches |
| Knee clearance under island | 12–15 inches |
| Island depth (standard) | 24–36 inches |
Always prioritize 42+ inches where possible-this ensures safety, functionality, and long-term usability. For kitchens with seating or heavy appliance use, 48 inches is non-negotiable . Test your layout by mimicking cooking workflows before finalizing! 🔍
How to build kitchen island with base cabinets
Here's a comprehensive guide to building a kitchen island using base cabinets, synthesized from expert sources and optimized for DIY success:
🧰 1. Planning & Preparation
Key Measurements
Clearance: Maintain **≥36–48 inches** between the island and surrounding cabinets/walls for walkways and appliance access .
Dimensions: Minimum island size: 4' long × 2' deep. For seating, allow 10–12" overhang per stool (22–24" width per seat) and 12–15" knee clearance.
Layout: Sketch your design, accounting for plumbing/electrical needs. Stock base cabinets (e.g., IKEA, Home Depot) simplify assembly .
Material Checklist
| Component | Materials/Tools |
|---|---|
| Structure | Base cabinets (e.g., 30" wide × 24" deep), 2x4 lumber for supports . |
| Countertop | Butcher block, laminate, or stone; sized for overhang. |
| Finishing | Toe-kick panels, back panel, edge banding, paint/stain. |
| Tools | Drill, level, clamps, circular saw, nail gun, countersink drill bit, shims . |
🔨 2. Step-by-Step Construction
A. Subfloor Preparation & Support Frame
Secure 2x4 Supports:
Cut 2x4s to match cabinet lengths. Anchor to subfloor using:
Concrete subfloors: .22-caliber powder-actuated fasteners .
Wood subfloors: 2.5" drywall screws .
Ensure supports are level and square to walls.
Flooring Consideration:
For floating floors (laminate/vinyl): Install island before flooring.
For nailed/glued floors: Install flooring first .
B. Cabinet Assembly
Position Cabinets: Slide cabinets over supports, aligning fronts.
Join Cabinets:
Clamp units together; pre-drill and screw through sides/stretchers using 2.5" cabinet screws.
Check level with shims under cabinets .
C. Toe-Kick & Back Panel Installation
Toe-Kick:
Build an L-shaped frame from 2x4s, set 3" back from cabinet fronts × 4" high .
Attach to cabinet bases with nails/screws .
Back Panel: Add ¼" plywood or matching finish panel to conceal wiring/plumbing .
D. Countertop Mounting
Size Countertop: Extend 8–12" beyond cabinets for seating .
Attach: Secure with screws drilled upward through cabinet frames .
⚙️ 3. Design Customizations
Storage Enhancements: Add pull-out shelves, spice racks, or wine glass holders .
Mixed Cabinet Styles: Combine base cabinets with wall cabinets (e.g., 30" high) for tiered storage .
Mobility: Install locking casters for a rolling island .
⚠️ 4. Critical Pitfalls & Solutions
| Issue | Solution |
|---|---|
| Unstable Island | Anchor supports to subfloor; add corner braces for rigidity . |
| Seating Overhang Sag | Limit overhangs to ≤12"; use corbels or legs for extensions . |
| Door Misalignment | Adjust concealed hinges; ensure cabinets are clamped before screwing . |
| Visible Edges | Apply iron-on veneer tape or PVC edge banding . |
💰 5. Cost & Time Estimates
Materials: 200–800 (stock cabinets + countertop) vs. $1,500+ for custom .
Time: 6–10 hours (excluding countertop fabrication) .
Savings Tip: Use IKEA SEKTION or Home Depot stock cabinets for modular assembly .
🎨 6. Finishing Touches
Paint/Stain: Sand cabinets (120→220 grit); seal with oil-based primer before painting .
Hardware: Install handles 2–3" from edges .
Lighting: Add pendant lights above seating areas (pre-wire during framing) .
Pro Tip: Start with a small island (e.g., single 36" cabinet + 12" overhang) to test techniques before scaling up . Always verify local codes for electrical/plumbing permits!
Transform Your Kitchen with MINO Custom Cabinets
AtMino, we specialize in providing high-quality, custom kitchen cabinets designed for durability, functionality, and style. Whether you're opting for stock, semi-custom, or fully customized cabinetry, our expert team ensures a seamless installation process tailored to your needs.
From precise planning and professional craftsmanship to innovative storage solutions, Mino Cabinet are built to enhance your kitchen's efficiency and aesthetic appeal. Let us help you create a beautiful, long-lasting kitchen that suits your lifestyle.
• Explore our premium cabinet collections today!
• Contact MINO for expert guidance and a hassle-free installation experience!


