


how high should a mirror be above a bathroom sink
Sep 04, 2025
Leave a message
how high should a mirror be above a bathroom sink

The ideal height for a bathroom mirror above the sink balances functionality, aesthetics, and the needs of all users. Here's a comprehensive guide to help you get it right:
1. General Height Guidelines
The most commonly recommended placement is for the bottom of the mirror to be 5 to 10 inches (approximately 13 to 25 cm) above the sink countertop
This ensures a comfortable viewing angle and helps prevent water splashes from reaching the mirror.
A key principle is to position the center of the mirror at eye level for the average user, which typically falls between 55 to 65 inches (140 to 165 cm) from the floor
This range accommodates most adults standing at the sink.
2. Adjusting for User Height
For households with users of significantly different heights, consider these adjustments:
Tall Users: Position the mirror's center closer to 65 inches (165 cm) from the floor.
Shorter Users or Children: You can lower the mirror so its center is around 48 to 52 inches (122 to 132 cm) from the floor. Alternatively, some recommend installing a separate, lower mirror or an adjustable model for children that can be raised as they grow.
3. Considering Vanity and Sink Height
The height of your vanity is crucial for determining mirror placement:
Standard vanity heights are typically between 32 to 36 inches (81 to 91 cm).
The 5 to 10 inch rule above the countertop helps create a visually balanced setup between the vanity and the mirror.
4. Lighting and Fixture Considerations
Avoiding Interference: Ensure the mirror doesn't block or interfere with existing fixtures like faucets, lights, or wall-mounted accessories.
Optimal Lighting Placement: For the best illumination without shadows, especially with LED mirrors, light fixtures should ideally be 75–80 inches above the floor or 2–3 inches above the mirror.
Integrated LED Mirrors: If your mirror has built-in lights, ensure its placement provides even facial illumination. The angle of the light is important for tasks like shaving or makeup application.
5. Accessibility and ADA Compliance
For accessible design, the Americans with Disabilities Act (ADA) recommends:
The bottom edge of the mirror be no higher than 40 inches (101 cm) above the floor to ensure visibility for seated individuals and those using wheelchairs.
6. Installation and Safety Tips
Secure Mounting: Use appropriate hardware for your wall type. For tiled walls, it's often recommended to drill at the grout lines to minimize cracking and use plastic anchors and screws.
Choosing Adhesive: If using adhesive, opt for a neutral-cure silicone sealant instead of acidic formulas, which can damage the mirror's reflective backing over time.
Frameless Consideration: In humid bathrooms, frameless mirrors can be a practical choice as frames made of materials like wood or leather may deteriorate.
7. Design and Aesthetic Tips
Proportion: For a balanced look, a common rule is to choose a mirror width that is about 2/3 to 3/4 the width of the vanity.
Style: Frameless mirrors offer a sleek, modern look and can make a small space feel more open, while framed mirrors can add a classic touch.
Placement: Be mindful of the mirror's reflection. Avoid placing it directly opposite a door or in a position where it reflects clutter or undesirable areas.
Conclusion
The optimal height for your bathroom mirror is 5-10 inches above the sink, centering it around 55-65 inches from the floor to align with average eye level. Remember to factor in the heights of all users, your vanity dimensions, and lighting needs. For a truly customized setup, consider measuring the eye level of the primary users before installing. A well-placed mirror will enhance both the functionality and overall aesthetic of your bathroom.
how to decorate bathroom sink

Here are some creative and practical ideas to decorate your bathroom sink area, transforming it into a stylish and functional space:
1. Choose Functional and Stylish Accessories
Select accessories that combine utility with aesthetics to keep the area organized and visually appealing.
Soap Dispensers and Toothbrush Holders: Opt for cohesive sets in materials like ceramic, glass, or brushed metal to create a streamlined look. This reduces clutter and elevates the sink's appearance.
Decorative Trays: Use trays to group essentials like soap, lotion, or a small vase. This adds organization and a touch of elegance.
Statement Items: Consider unique pieces like a sculptural toothbrush holder or a marble soap dish to add personality and luxury.
2. Incorporate Greenery
Plants bring life and freshness to the sink area, improving air quality and adding a natural touch.
Low-Maintenance Plants: Choose varieties like succulents, pothos, or snake plants that thrive in humid, low-light conditions. Place them on the counter, in wall-mounted planters, or on shelves.
Herbs or Mini Gardens: For a functional twist, add small potted herbs like mint or basil, which enjoy bathroom humidity and provide fresh scents.
3. Utilize Wall Space and Mirrors
Maximize vertical space to enhance functionality and style, especially in smaller bathrooms.
Statement Mirrors: Upgrade to a mirror with an ornate frame, backlighting, or an asymmetrical design to serve as a focal point. LED mirrors offer both style and practical illumination.
Floating Shelves: Install shelves above or beside the sink to display decor items, store toiletries, or hold plants. This saves counter space and adds visual interest.
Artwork and Wall Decor: Hang small framed prints, inspirational quotes, or even functional items like decorative shelves or hooks to personalize the space.
4. Add Color and Texture
Incorporate elements that introduce visual depth and cohesion to your sink area.
Towels and Rugs: Use vibrant or textured hand towels and a soft rug to add pops of color and comfort. Choose colors that complement your overall bathroom palette.
Backsplashes: Install a stylish backsplash with patterned tiles, natural stone, or metallic finishes to protect walls and add a design element.
Decorative Jars and Canisters: Store cotton balls or Q-tips in glass jars or decorative canisters for a spa-like, organized look.
5. Enhance with Lighting and Personal Touches
Lighting and personal items can significantly impact the ambiance and functionality of the space.
Accent Lighting: Use pendant lights, sconces, or LED strips to create a warm, inviting glow. Dimmable options allow for adjustable ambiance.
Scented Elements: Add scented candles, diffusers, or essential oil reed diffusers in calming fragrances like lavender or citrus to enhance relaxation.
Personal Items: Display small framed photos, travel souvenirs, or artisan-crafted items to make the space uniquely yours.
6. Maintain Cleanliness and Organization
A clutter-free and clean sink area ensures your decorative efforts shine and the space remains functional.
Daily Habits: Wipe down surfaces daily to prevent water spots and soap scum buildup. Regularly declutter countertops to maintain a tidy appearance.
Smart Storage: Use drawer organizers, decorative baskets, or under-sink storage to keep essentials accessible but out of sight.
By thoughtfully selecting accessories, incorporating natural elements, utilizing wall space, and adding personal touches, you can create a bathroom sink area that is both beautiful and highly functional.
how to organize under the bathroom sink
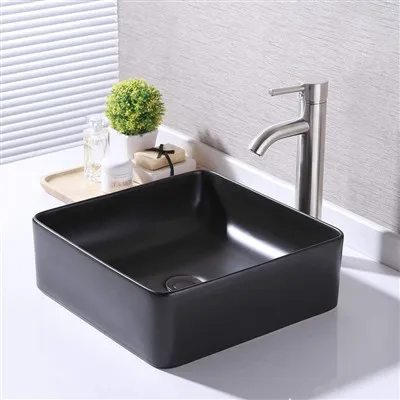
Here is a comprehensive guide to organizing the space under your bathroom sink , transforming it from a cluttered zone into a model of efficiency and order.
1. Empty and Declutter
Begin by completely emptying the cabinet. Sort all items into three categories: keep, toss (expired, broken, or unused products), and relocate (items that belong elsewhere in your home). This crucial first step ensures you only store what you truly need and use in that space
2. Measure and Assess Your Space
Grab a tape measure and note the width, depth, and height of the usable area under your sink. Pay close attention to the layout of plumbing pipes, as this will determine what type of organizers will fit. Understanding your cabinet type (e.g., single-sink with a center pipe, double-sink vanity, or pedestal sink) is key to choosing the right solutions
3. Create Zones and Categorize Items
Group remaining items by category or frequency of use. Common categories include:
Daily Essentials (e.g., face wash, moisturizer, toothpaste): Store these at the front for easy access.
Cleaning Supplies: Keep together in a caddy or on a specific shelf.
Backup Toiletries & Refills: Store these towards the back or in labeled bins.
This "zoning" approach makes it easy to find what you need and maintain order.
4. Select the Right Organizers
Choose storage solutions that fit your space, budget, and needs.
Stackable Bins or Drawers: Maximize vertical space. Clear bins are ideal for visibility, allowing you to see contents at a glance.
Pull-Out Trays or Drawers: These provide effortless access to items at the very back of the cabinet, eliminating the need to dig. Look for options designed to fit around plumbing.
Tension Rods: Install horizontally to hang spray bottles by their triggers, freeing up floor space.
Door-Mounted Organizers: Utilize the inside of cabinet doors with over-the-door racks, adhesive hooks, or magnetic strips for small metal items (e.g., bobby pins, tweezers).
Lazy Susans: A rotating turntable makes accessing items in deep corners easy.
5. Maintain and Protect Your System
Label Everything: Clearly label bins and containers. This helps everyone in the household know where items belong and makes restocking easier.
Protect from Moisture: Use a waterproof liner on shelves and choose plastic bins with lids to protect contents from potential dampness or accidental spills.
Schedule a Monthly Reset: Set a calendar reminder for a quick 5-minute check-in. Toss any new clutter, wipe down surfaces, and ensure everything is still in its designated zone. This small habit prevents mess from accumulating again.
Pro Tip: Maximize Every Inch
For truly challenging spaces, consider these clever hacks:
Use risers to create a second level within the cabinet for smaller items.
Repurpose items like a clear over-the-door shoe organizer for toiletries or small baskets for hairdryer and cords.
Install a pull-out caddy system for cleaning supplies, making them portable for easy transport around the bathroom.
By following these steps, you can create a highly functional and organized under-sink area that saves time, reduces stress, and makes your daily routine smoother. The key is to find the right combination of solutions that work for your specific space and habits
how to prevent bathroom sink from clogging

Here are several effective strategies to prevent your bathroom sink from clogging, based on common causes and proven preventive measures:
1. Use a Drain Strainer or Hair Catcher
Install a mesh or silicone drain cover to catch hair, soap fragments, and other debris before they enter the drain. This is the most effective way to prevent clogs, as hair is the primary culprit in bathroom sink blockages.
Clean the strainer weekly by removing accumulated hair and rinsing it under running water. Consistent maintenance ensures optimal function.
2. Adopt Smart Sink Usage Habits
Avoid rinsing excessive soap, toothpaste, or skincare products down the drain. Scrape residue into the trash instead.
Never pour grease, oils, or lotions into the sink, as they solidify and accumulate in pipes, trapping other debris.
Run hot water for 1–2 minutes after each use to flush away soap scum and dissolve minor grease buildup. Hot water helps prevent residue from adhering to pipe walls.
3. Perform Regular Maintenance Cleaning
Weekly: Flush the drain with boiling water to melt light grease and soap deposits.
Monthly: Use a natural cleaner like a baking soda and vinegar mixture:
Pour ½ cup baking soda down the drain, followed by ½ cup white vinegar.
Cover the drain to contain the fizzing reaction, wait 15–30 minutes, then flush with hot water. This breaks down organic buildup and deodorizes pipes.
Quarterly: Clean the P-trap (the U-shaped pipe under the sink) by unscrewing it, removing debris, and rinsing thoroughly. This prevents deep clogs from forming.
4. Avoid Harmful Products and Practices
Skip chemical drain cleaners, as they can corrode pipes over time and harm the environment. Opt for mechanical or natural methods instead.
Keep small objects (e.g., jewelry, cotton swabs, dental floss) away from the sink to avoid accidental drops that cause blockages.
5. Educate Household Members and Monitor Usage
Teach family members, especially children, about proper sink use-e.g., disposing of debris in trash cans rather than rinsing it away .
Address slow drainage immediately to prevent minor issues from escalating into full clogs. Use a plunger or drain snake early if needed.
Conclusion
Preventing bathroom sink clogs hinges on consistent maintenance, mindful usage, and proactive measures. By combining physical barriers (e.g., drain strainers), natural cleaning routines, and household education, you can minimize blockages and maintain smooth drainage. If clogs persist despite these efforts, consult a professional plumber to check for underlying issues like pipe damage or deep sewer line problems.